
Since this is my first update since the site is published I would like to let you know more about the project.
All information is found on various sites on the net and I had to investigate a lot to get it work in the way it is supposed to. This since I use PMDG 738 and not ProSim 737 as most home flight deck builders are using.
So why PMDG and not ProSim?
Well it is a matter of how competent the simulator is and the price of it.
ProSim has a lot of small details that fail so far and it is, according to me, overpriced on the market. €1200 that is simply way too much.
PMDG is a fully functional Boeing simulator without missing details such as runway turn off lights, different buttons for landing lights etc. All the details I will not go in detail here. But investigate yourself and you will find a lot of things.
I will stay with PMDG since they are under way constructing a software for home flight deck builders which is great!
The problem with PMDG is that you do not have an ability to disable the 3D flight deck, and that is a bit sad cause it is eating memory both from the GPU and CPU.
But so far my project is developed in parts by part.
First project – overhead panel
Found a number of great sites and sellers of various overhead products. How you want to do it depends on how much money you can throw in your project. My suggestion is to go step by step and it will not eat a giant hole in your pocket and bank account.
So I found a builder in Denmark, Peter that you can visit here; http://buildaboeing.com
He has a wonderful project going on for some times and you can learn a lot from him by watching videos and reading his site.
Found some blueprints for the overhead panel that I downloaded and printed in Denmark with shipment to me in Sweden. About €45 for all the panels printed on sticker.
While I was waiting for this print to arrive I began doing the light switches panel. Cut out the panel in 5mm acrylic glass. Found great switches to buy and it was a simple task. First of all I had to print the panel on a standard laserprinter to get the layout and buttons in the correct positions. Then it just looked like this;
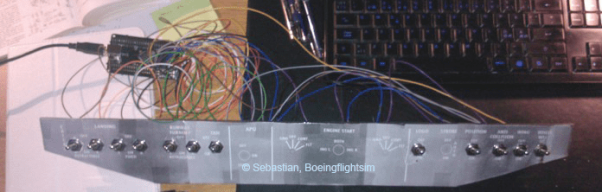
Does not look much maybe, but it was working then. All the buttons are connected to a Leo Bodnar BBI-64 interface card which is very, very easy to program and setup using FSUIPC. See more details below.
The final overhead panel (with all switches) looks like this when it is fully operational;
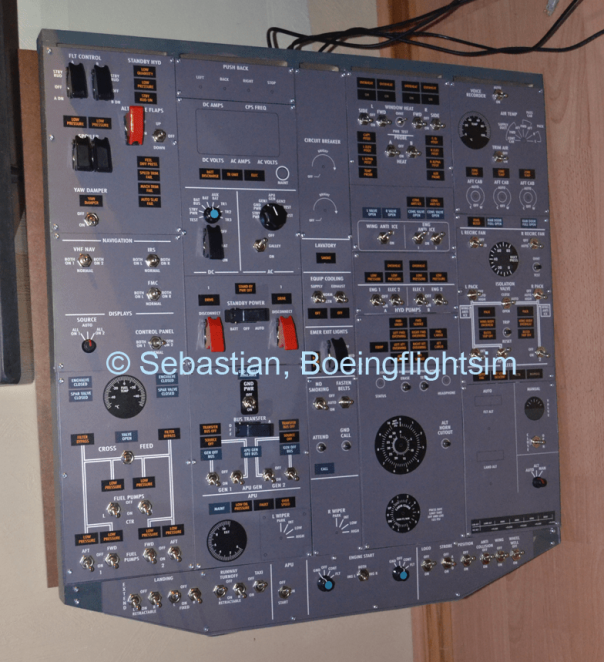
So far not all the knobs are the correct ones, they are just the ones found at home while constructing. This is a long term project and will be updated during the build of the simulator.
However all switches work and are tested in flight and its a miracle flying with panels instead of a mouse to set switches.
The panel is built on a wood frame painted in Boeing grey.
All panels are made of acrylic glass which is easy to cut.
Connecting via FSUIPC
For the overhead panel three interface cards are used since there are a lot of switches and positions to be controlled. Have only used BBI-32 and BBI-64 interface cards for this panel. In all there is about 97 positions to program.
You will need to find a list of how to tell the PMDG 737-800 what you want to do when you push a switch. This can be found on many places on the net but also in the SDK kit that comes with PMDG 737. However that is a bit difficult to use for a non-programmer.
For an instance when you program a switch in FSUIPC you will need to input a code for each switch. Taxi lights have the code 69749 and then set 1 for ON and 0 for OFF. That’s it. Easy. Then go ahead and test it. No problems!
Once you have the code for each switch you will use the programming using FSUIPC is fast done. It took me some time understanding it but after a while everything was very easy.
Make sure you find the list of codes so you do not have to look up all codes for each switch. There are a number of sites having the lists and that will do the job much easier for you.
